
Banners!
A banner makes a terrific addition to any celebration, and here's a few tips on how to make your own! It requires some simple supplies and just a little time, and is worthy of the effort if you are interested in keeping costs down for your party decorating budget.
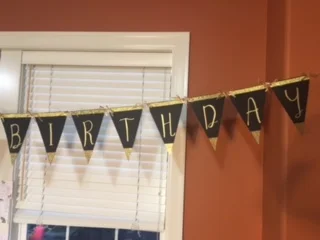
Here's an example of what you can do! I couldn't get the entire banner in the picture, but believe me, its a Happy Birthday :-)
Lettering can be done with stencils, or freehand. What - freehand, me? Don't be afraid of freehand (actually I was) but I tried it and loved it! Open a word document on your computer, type your wording or insert graphics you want to use for your banner, and enlarge it so it is easy to see and follow. With the computer screen in front of you, start your freehand lettering, continuously referring to your computer screen lettering as a guide. It's a forgiving project, you will be surprised, and proud when you are done!

There are so many possibilities for embellishing a banner, after it is put together you may find the perfect place to use those little jewels that have been in a drawer with your craft supplies for years. But for starters, here are the supplies I used for this banner, its really not much for the basics, then you can consider all the different options for embellishing the banner!
- Banner pendant stencil, the one pictured here was purchased at a craft store, you could easily make your own out of cardboard or card stock.
- Card stock for the banner pendants - your choice of colors - so many options!
- Optional - extra paper for embellishing. The gold glitter paper pictured with the supplies was used to cut a small triangle for the bottom of the banner pieces - makes a great addition!
- Paper cutter or scissors.
- Ribbon for across top of banner pendant pieces. Gold glitter ribbon is pictured here.
- Hole punch for top of banner pieces.
- String, twine, or jute to string banner pendants, just make sure its strong enough to hold.
- Ribbon to tie through holes on banner pendants and attach to string so they don't slide.

Start by selecting the card stock for the banner pendants. You can perfectly match the theme of your party, whether black for an "over-the-hill" birthday, pastels for a baby shower, or a mix of fiesta colors for a summer party! Using the banner pendants stencil, mark your cutting lines with pencil on the back of your card stock and cut the banner pendants. Next, use your lettering guide to freehand or your purchased stencils, and insert the lettering and/or numbers on the banner pendants. Now time for extra embellishments - this banner has gold glitter ribbon across the top and an extra gold glitter triangle on the bottom which is cut from paper. But imagine the possibilities - washi tape, ribbon, cut or punched pieces of paper, embellishment pieces from the craft store - diamonds, arrows, pink flamingo's (you can find anything there!), or even your own images or photos. The ideas are endless.
After you finish decorating, punch two holes in the top corners of the banner pendants and thread the string through. You can choose whether to display the string on the front of the banner pendant or on the back so it doesn't show as much. Place ties through each hole using ribbon, raffia, tule - again, so many options, and tie the pendants in place. This banner has shiny ribbon tied into bows, but I can picture curling ribbon dangling down also :-) This does add another layer of decor to the banner, but on the other hand, if you have embellished so much that you don't want to add more, a piece of scotch tape on the back of the banner could hold the banner pendant in place, you just don't want the pieces to slide around!
Oh the things you can do with a banner! I hope you enjoy this craft, post pictures of your own banner to share!
Enjoy!
